Following are 18 photos of a Swivel Laptop Workstation Table I made for my 2002 Dodge RoadTrek, one can also be made for the Chevy RT's
PHOTO: # 001:
01: Table Top= 14 3/4" x 11 1/4"x 3/4"= [12 inch Board] For Laptop Workstation Table
02: Table Support Brace Bracket = 12 1/4" Long - 1 1/4" Wide - 1/2" Thick
03: Board= 7 1/4"x 12"x 3/4" = [8 inch Board]
04: Board= 7 1/8"x 4 5/8"x 3/4" = [8 inch Board]
05: Board= 11"x 9 1/4"x 3/4" = [12 inch Board] Extension Shelf For Mouse & Mouse Pad
06: 1= 2"x 4"x 5 1/2" Tapered 2 x 4 Board-Mounting Block
07: 1= 2"x 4"x 4 3/8" Tapered 2 x 4 Board-Mounting Block
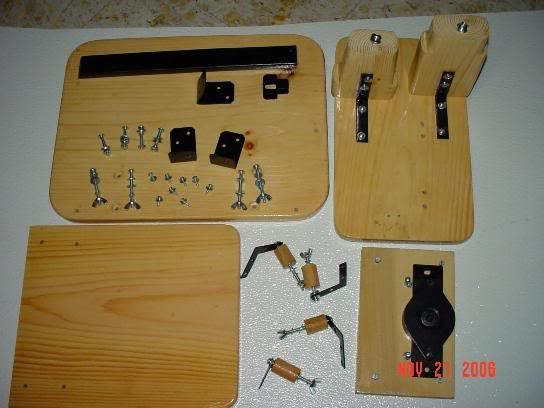
PHOTO: # 002:
01: Board= 7 1/4"x 12"x 3/4"
02: 1= 2"x 4"x 5 1/2" Tapered 2 x 4 Board-Mounting Block
03: 1= 2"x 4"x 4 3/8" Tapered 2 x 4 Board-Mounting Block
04: 2= 10-24 Tee Nuts 1 for each Mounting Block
NOTE: Each 2"x 4" Mounting Block is notched for 10-24 Tee Nuts to be inserted

PHOTO: # 003:
01: 3= 1 1/4" Wide Angle Brackets - Strong Tie
02: 1= Plywood Sheeting Clip
03: 4= 2 inch 10-24 Machine Round Head Slotted Screws
04: 4= 2 1/2 inch 10-24 Machine Round Head Slotted Screws
05: 2= 1 inch 10-24 Machine Round Head Slotted Screws
06: 4= 1 inch #6 Sheet Metal Screws
07: 8= 3/4 inch #6 Sheet Metal Screws
08: 6= 1/2 inch #6 Sheet Metal Screws
09: 4= 1 inch Wood Screws
10: 8= 10-24 Wing Nuts
11: Numerous #10 Flat Washers
12: Numerous # 10 Lock Washers
13: Numerous #8 Flat Washers
14: Numerous #6 Flat Washers
15: 4= 3/4 inch Dowels - Drill through center use 13/64" drill
16: 1 Rotating Plate with Ball Bearings - Snaps/Stays In 4 Positions
17: 2= 3 inch Corner Brackets
18: 3= 2 inch Flat Corner Irons
19: 1= 2 inch Mending Plate
20: 2= 10-24 Tee Nuts
21: 1= Table Support Brace Bracket = 12 1/4" Long - 1 1/4" Wide - 1/2" Thick
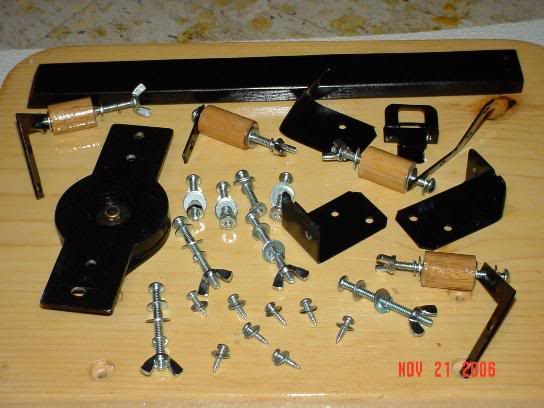
PHOTO: # 004:
01: Laptop on Workstation Table Facing Drivers Seat
02: Laptop secured with 2 bungee's for more security
03: Laptop secured with 2" Flat Corner Irons & 2" Mending Plate- 3/4" Dowels
04: 3/4" Dowels drilled through center for 10-24 Machine Round Head Slotted Screws
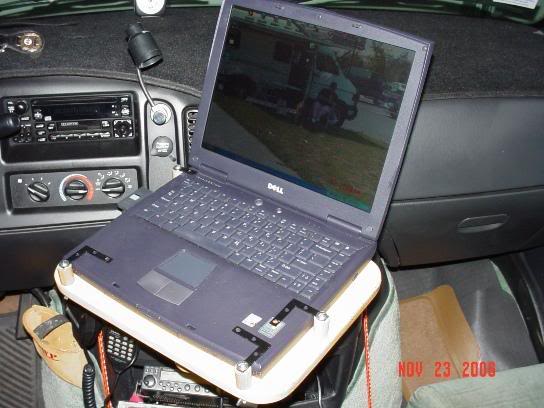
PHOTO: # 005:
01: Laptop on Workstation Table Facing Front Passenger Seat
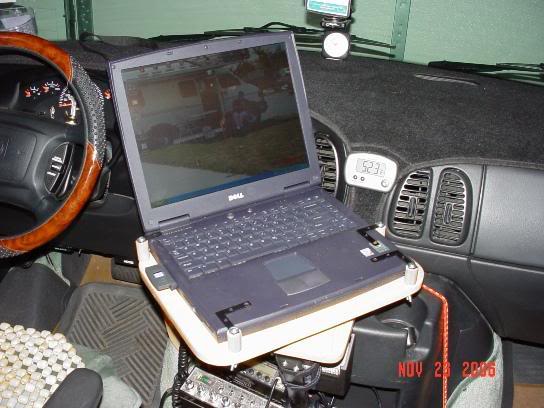
PHOTO: # 006:
01: Laptop on Workstation Table Facing Drivers Seat with Extension Shelf for Mouse & Mouse Pad
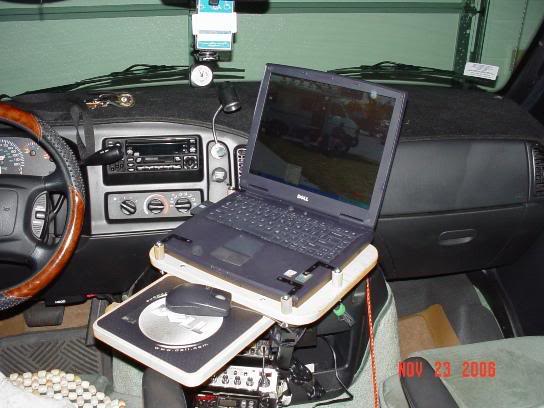
PHOTO: # 007:
Laptop on Workstation Table Facing Rear with Extension Shelf for Mouse & Mouse Pad
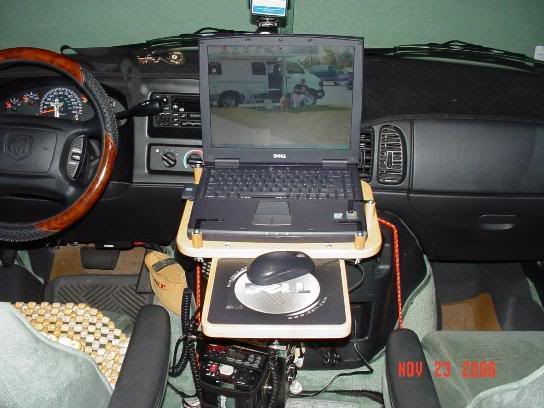
PHOTO: # 008:
01: Red Tip Pointer showing Dell Laptop Power Adaptor
02: Power Adaptor secured with 8" Magic Ties onto Table Support Brace
Bracket
02: 2 Bungee's secured on Screw Eye, Screw Eye secured onto Workstation 7 1/4"x 12"x 3/4" Baseboard
03: 2 Bungee's secured to bottom Engine Cover Floor Clamps
04: Table Support Brace Bracket top secured onto Baseboard with 1 1/4" Wide Angle Brackets - Strong Tie
05: Table Support Brace Bracket bottom secured onto bottom engine cover storage area lip with Plywood Sheeting Clip
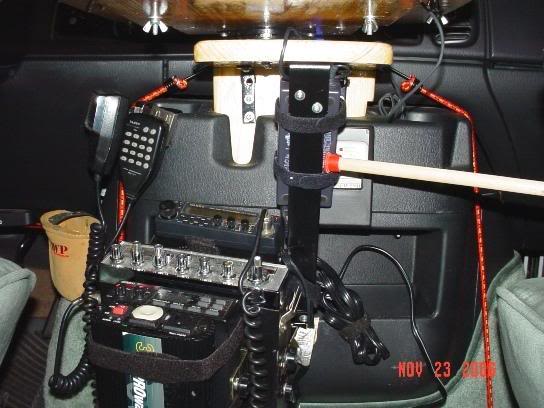
PHOTO: # 009:
01: Same Information as Photo #4
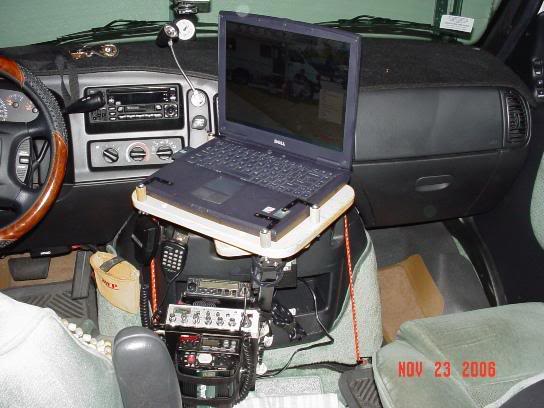
PHOTO: # 010:
01: Laptop Power Adaptor plug connected to 300 Watt Inverter
02: Overhead Under cabinet light connected to 300 Watt Inverter
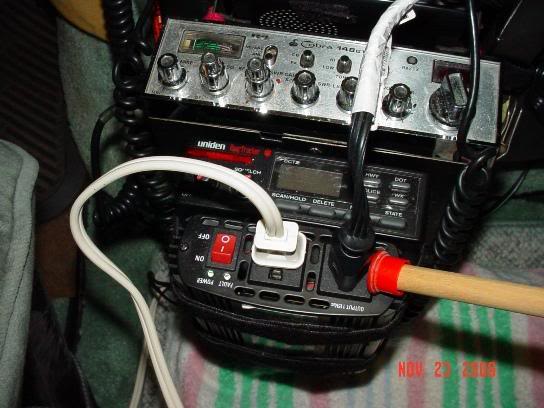
PHOTO: # 011:
01: Bungee passenger side secured on Screw Eye onto Workstation 7 1/4"x 12"x 3/4"Baseboard & secured to bottom Engine Cover clamp
02: Rotating Plate with Ball Bearings - Snaps In Position connected between 7 1/4"x 12"x 3/4"Baseboard & 7 1/8"x 4 5/8"x 3/4" Board which is secured to Workstation Table
03: Workstation Table attached to both Tapered 2"x 4" Mounting Blocks
04: 2"x 4" Mounting Blocks sitting in cup holder & Ashtray holder of engine cover
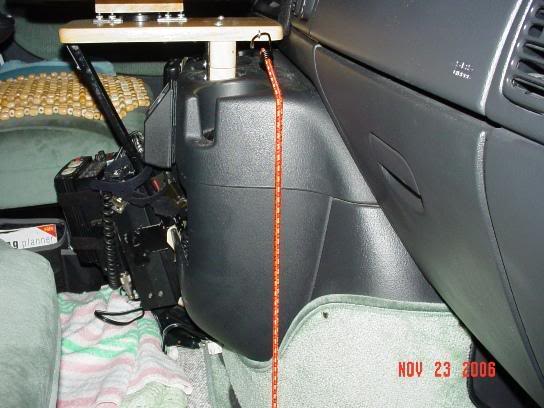
PHOTO: # 012:
01: Power Adaptor secured with 8" Magic Ties onto Table Support Brace
Bracket
02: 2= 3 inch Corner Brackets secured to both Tapered 2"x 4" Mounting Blocks, & 7 1/4"x 12"x 3/4" Baseboard

PHOTO: # 013:
01: Table Support Brace Bracket bottom secured onto bottom engine cover storage area lip with Plywood Sheeting Clip
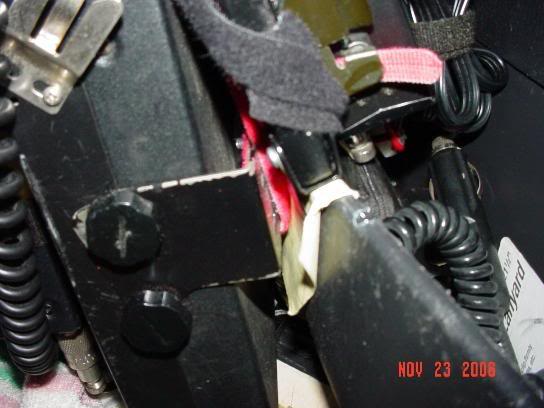
PHOTO: # 014:
01: Overhead Under Cabinet Light 13 inch, 8 Watt Fluorescent Light attached to Overhead Storage with Industrial Velcro
02: Light works on both AC and 300 Watt Inverter
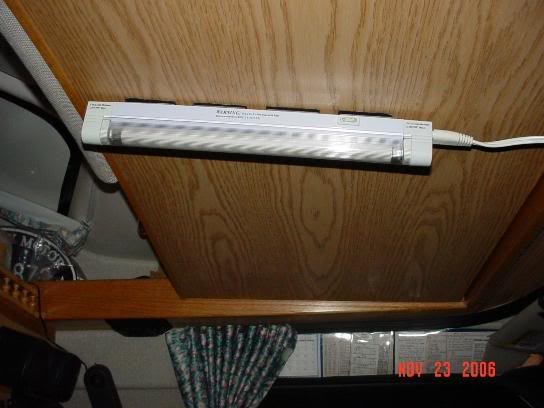
PHOTO: # 015:
01: Rotating Plate with Ball Bearings - Snaps/Stays In 4 Positions, connected between 7 1/4"x 12"x 3/4"Baseboard & 7 1/8"x 4 5/8"x 3/4" Board which is secured to Laptop Workstation Table
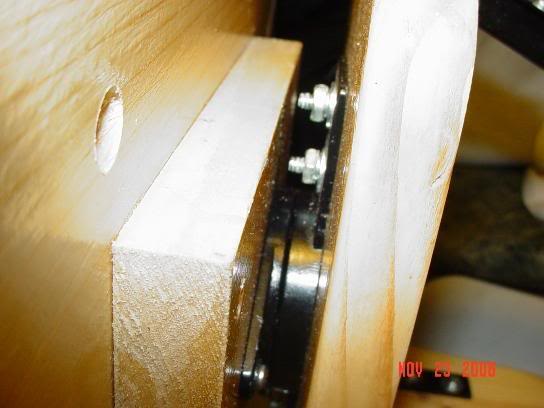
PHOTO: # 016:
01: Rotating Plate with Ball Bearings - Snaps/Stays In 4 Positions, connected between 7 1/4"x 12"x 3/4"Baseboard & 7 1/8"x 4 5/8"x 3/4" Board which is secured to Workstation Table
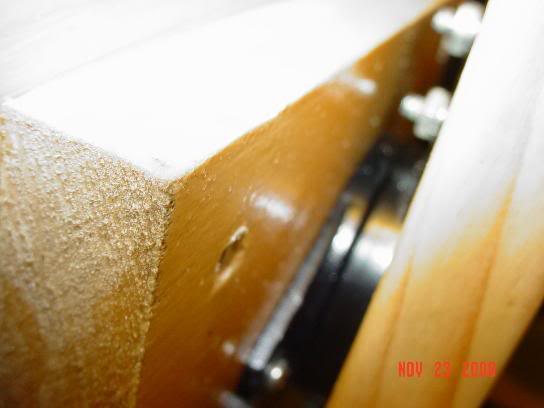
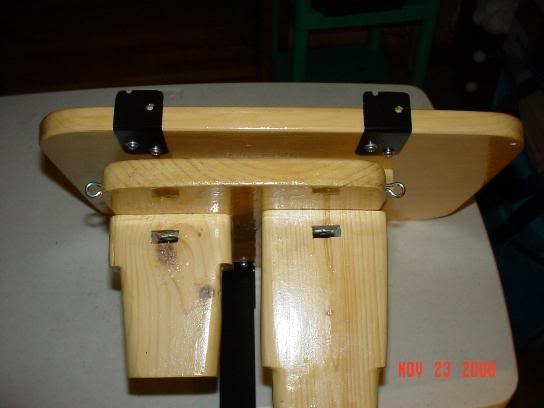
PHOTO: # 017:
01: 2: 1 1/4" Wide Angle Brackets - Strong Tie attached to Laptop
Workstation for back of Laptop, secures Laptop
02: Screw Eye secured onto Workstation 7 1/4"x 12"x 3/4"Baseboard
03: 2= Tapered 2"x 4" Mounting Blocks notched exposing 10-24 Tee Nuts, 2, 1 inch 10-24 Machine Round Head Slotted Screws screwed through 7 1/4"x 12"x 3/4" Baseboard into 10-24 Tee Nuts of Mounting Blocks
Note:
01: Laptop Station Table swivels left and right, individual can exit seats
comfortably
02: Extension Shelf for Mouse & Mouse Pad secured to Laptop Workstation with 2, 2 inch 10-24 Screws, and 2, 10-24 Wing Nuts, very secured
03: Laptop Station Table can also be used for a small portable TV or a DVD Player
04: Both Laptop and Overhead Under Cabinet Light operate on AC/DC
05: Dowels can be taken off of Laptop Station Table, and a small serving tray can be put ontop of Laptop Station Table