| Santee2005PWTD's Albums | |||
| Album Title | Pictures | Last Picture | |

|
TV, DVD and Cadence Amplifier
Working to get all components wired and working with each other again.
When we picked up our rig, the original Samsung TV/Monitor had been replaced with a 24" TV (way too big and heavy for the TV frame) and was disconnected from both the amplifier and the DVD player. Actions - - 1st thing test 12v plug-in behind TV a. 12v was dead We recently discovered that we have on/off switch under the passenger side rear bench with no idea what it is connected to. When turning on this switch we found that it activates the 12v TV plug on the antenna booster plate. (I'm dumb founded, who would have guess this; I've not seen this switch highlighted in any of the rig's original documents/brochures from PW or the original owner.) However, amplifier still does not come on. And although with the 12v DC switch in the on position, I can load a DVD into the player and it seems to want to read/play. - I'm still looking for a 12v dc TV - looking to reinforce door lock and hinge |
6 | 07-22-2021 09:00 PM |

|
Repaired Failing Wall Cloth - Holding up great a year later!
It has been mentioned that this job can be done by an upholstery shop for between $400 - $600 ... with 2021 current labor rate of $150 a hr for 8hrs and 3 days would put this job at $3,600.00. (the last time we had an upholstery job done my husband gifted me with a Tonneau cover for my 57T-Bird, the original OEM was $79 - the replacement cost $325 in 2005) Recovering the wall of your rig is a more labor intensive job and you want it done right. You've got to find a reputable shop that takes pride in their workmanship and that is willing to take the time and care to remove and reinstall all your wall panels. (I couldn't find a shop that would do this work, so we had to do it ourselves.)
Starting June /2021 (my husband and I got to work) - I purchased in/outdoor Canvas cloth at a cost of $300 - I created a head bumper with this new cloth. - recovered rig's entrance header and it looks GREAT! - R/R rear side window panels, these located just under the back cabinets. To remove you must carefully pry off the wood trim, which is only held on by brad nails, and remove the 3 screws located under the wood trim. When realigning the screws to reinstall these panels its a major pain so pack your patience. I've elected not to reinstall the wood trim, but to replace them with 3 screw buttons. - I've removed the back panels from around the rear door- oh what a bear; I had to take the end of the bed apart and with the threshold back panels I had to fish to find the screws that were hidden under the wall cloth. Challenging fight, but I won! and got everything removed. 7/1 - installed the cloth on the rear walls and now the fun begins in putting everything back together ;P 7/8 - all removed panels reinstalled Please enjoy viewing all the photos. Through all our hard work the hubby gained new patience; an while this job was not done by professionals, we say it looks GREAT! |
21 | 07-22-2021 08:00 PM |

|
Road Trips (drive and eats)
May 2021 - Donut Run (Escondido, Calif.)
(open - see pic of hours in album) - Peterson's Donut Corner **** (donuts are huge see pic) June - Donut Run (Linda Vista, Calif.) - Rose Donuts (5201 Linda Vista Rd) **** July - In search for a Danish Bakery (Carlsbad, Calif.) THIS IS OUR NEW AND LOCAL SOLVANG "it's Outstanding" - Carlsbad Danish Bakery ***** |
9 | 07-22-2021 02:47 AM |

|
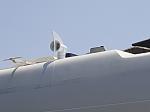
Open Roof Vent (Driver side near antenna )
Found on our roof top an open vent for the (Black/Grey) tanks. When hubby examined the top of the vent it appeared that it never had a cover. Although, it did have a very badly glue ring of larger PVC over the 1 1/2 black pipe which maybe helped the wall pipe to not move or vibrate; how I don't know as it was not attached to the roof. And he also found that the roof between the pipe and the roof line which would allow water to penetrate and sip into the rig roof/ceiling between the small gap from the hole made to fit the 1 1/2" black pipe through the roof.
As we had to seal the roof for this potential water leak, and never had any tank smells, we went ahead and installed a 360 cyclone vent. |
1 | 07-15-2021 10:16 PM |

|
Kitchen Enhancements
7/2021
- Added magnet spice rack above stove and sink - 1st road trip and no mishaps and no rattles - installed over the door kitchen towel rack |
3 | 07-12-2021 08:09 PM |

|
Kitchen Backsplash
Remove Plastic wall paper and replace with ??? aluminum peal & Stick stainless steel backsplash wallpaper.
|
4 | 07-12-2021 07:57 PM |

|
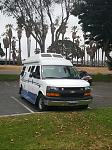
DaSilva's Class B
2005 Chevy, Express 3500 6.0
|
8 | 07-09-2021 08:27 PM |

|
Sewer Hose Stow
At sometime in our rigs life it lost its hose stow piping and we hope to rebuild it back and have it functional
|
4 | 06-29-2021 06:10 AM |

|
Grill Facelift
Painted stock Grill and Badge, installed new Signals and Headlights and as well added window shades and bug deflector.
|
3 | 06-24-2021 05:05 AM |

|
Bathroom Modifications
1. R/R: plastic towel ring for Purell hand sanitizer
2. Installed Stainless steel TP roll holder (peal & Stick) 3. Installed 2 over the door SS Towel holders |
3 | 06-15-2021 08:57 PM |