 |
|
 12-12-2011, 01:56 AM
|
#1
|
|
Platinum Member
Join Date: Aug 2010
Location: Minnesota
Posts: 12,457
|
 Dual 6v into 07 C190P Roadtrek
I have been working on this for a few weeks, and it is getting far enough along to start this thread, I think. It will be a lot of pics, and probably won't all happen at once, but I will keep adding to it.
Our 07 C190P Roadtrek had the two group 27 batteries, in front of and behind the passenger rear wheelwell. Two Trojan wet cells gave us 230AH, and are the biggest I could find. The newer units (2010?) come with two 6 volt GC2 group batteries at 220 amp hours, both in front of the wheelwell, and nothing behind it. My hope was to be able to keep the rear group 27 and add two 6 volts to the front area. Trojans the size of the OEM batteries would give 240AH, but I was hoping to use the "tall" version of them and get to 260AH, as Roadtrek mounts the slides high to clear their latch and bumper setup.
This is where we started:
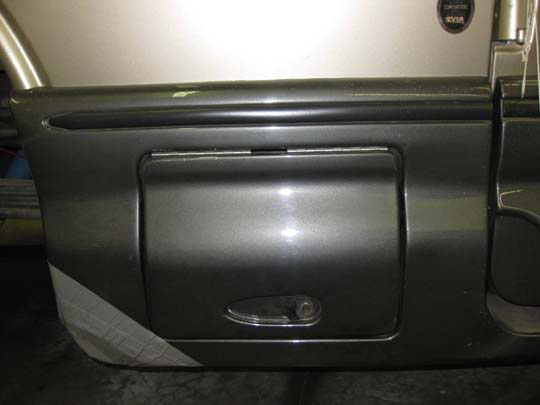
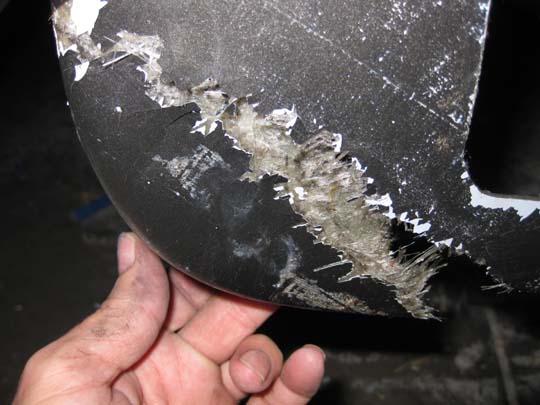
The timing is good because we had a roof blister to repair and damage to the running board, under the tape, so all the bodywork at the same time.
The stock tray and slides:
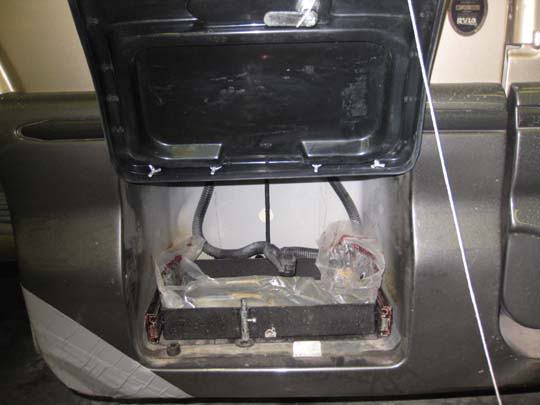
With the slides and tray out:
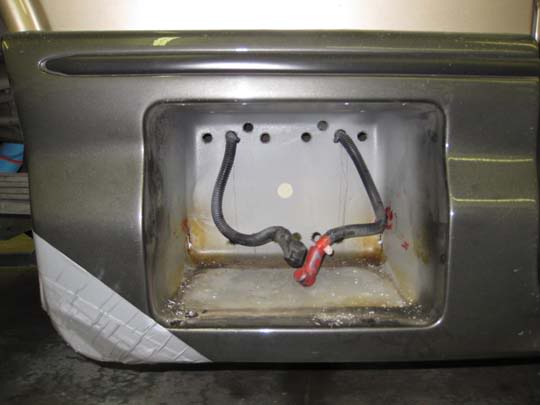
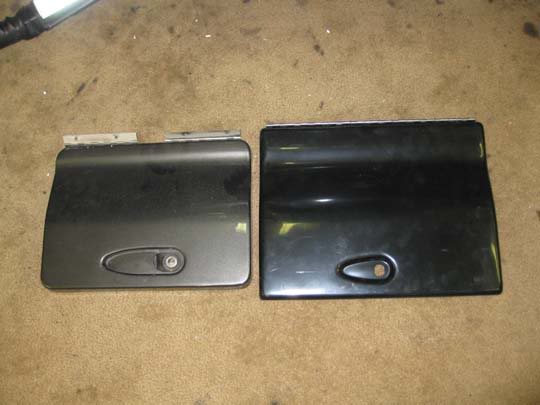
New and old doors, the opening has to be substantially bigger:
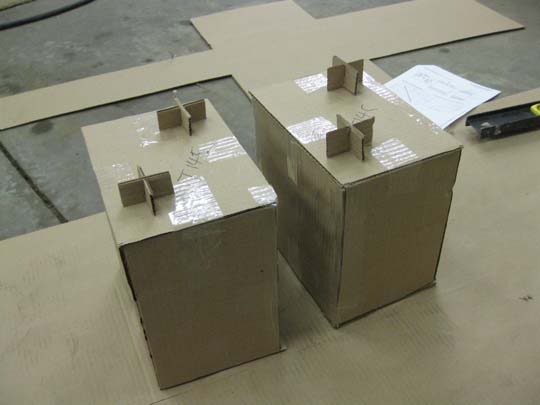
I didn't want to buy the big batteries and then have them be too tall, so I made some dummy batteries out of cardboard for fitting up things.
I taped it up, traced the door and cut the rough opening out, leaving as much flange as I could for location references.
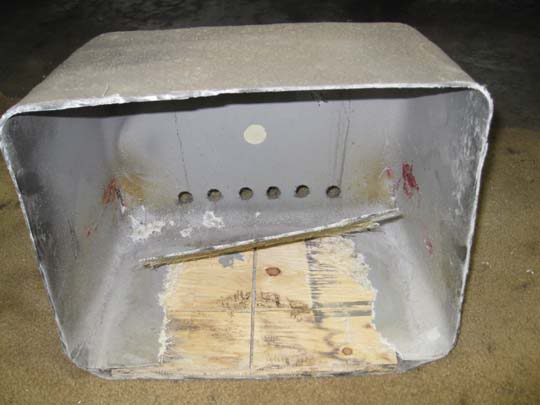
Fixed the damage first so the area would be strong enough to work on:
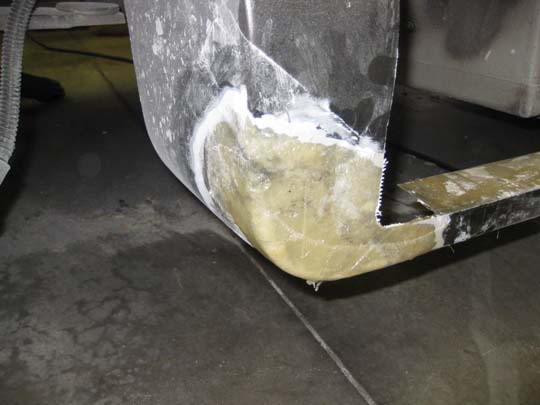
I used the front hanger as it was without modification:
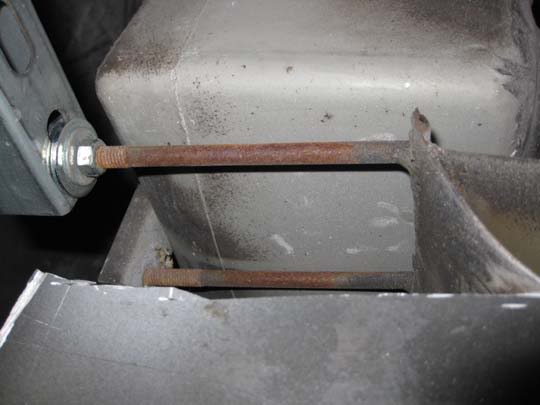
The rear hanger looked like this and needed to be completely cut away with part of the original van body:
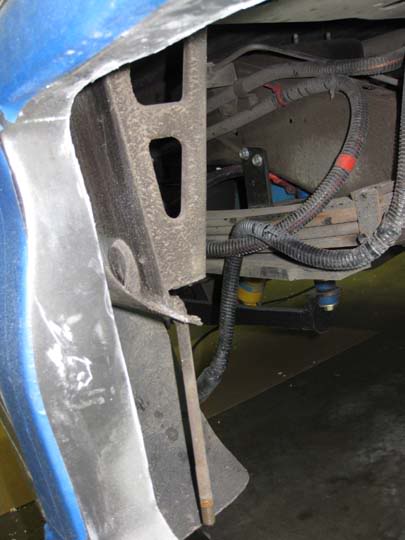
The new rear hanger is similar but moved:
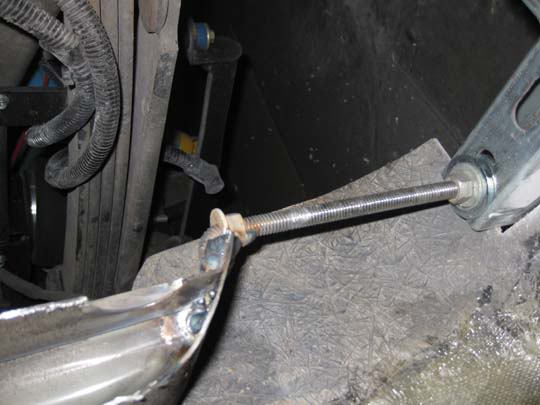
The inboard hangers are 3/8" steel bolted through the frame.
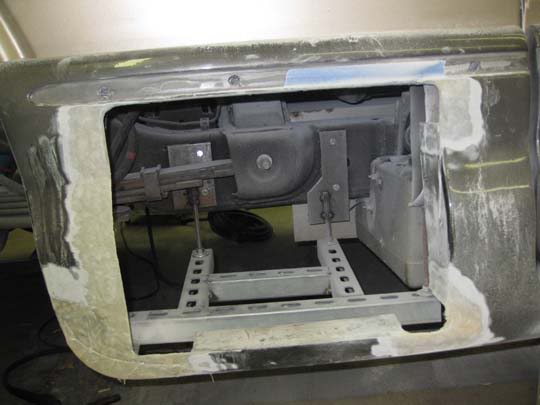
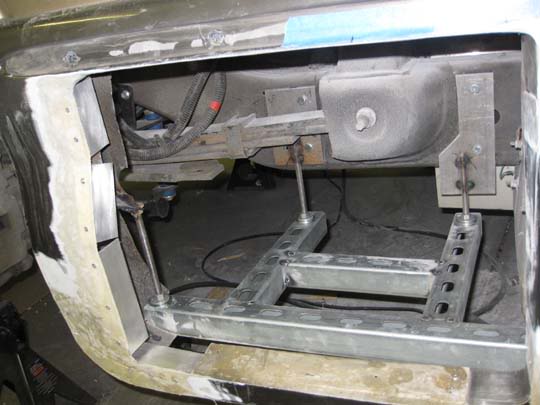
The subframe seen in the above pics and ones to follow is made of "J" channel that electricians and plumbers use to mount things. Strong and light and good for mounting through with support rods. It is a welded assembly.
This is the rough opening with paint ground and the base in place:
To get mounting flanges for the box, I pop riveted alum angle and other pieces to the existing glass:
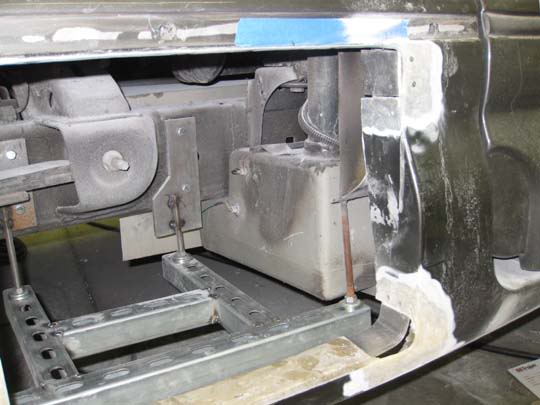
And then glassed them in:
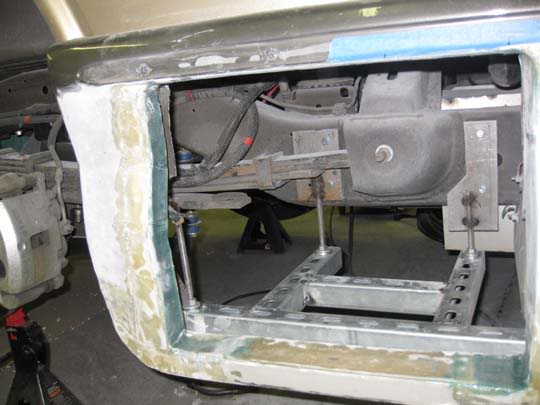
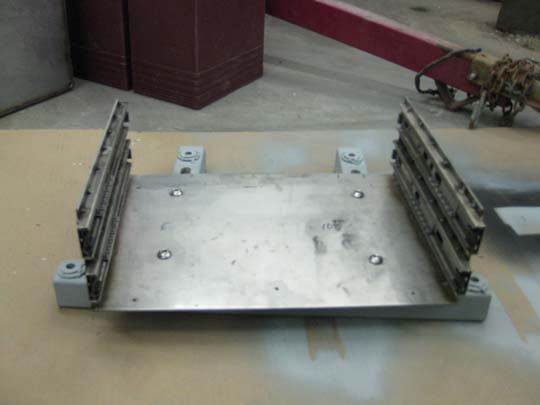
I made a U shaped mounting plate out of 11 gauge stainless to hold the tracks, similar to what Roadtrek does, the battery tray is 10 gauge stainless. both parts were made out of sheet, unbent and welded at the corners and meeting surfaces. The tracks are welded on to eliminate screws intruding into the box. I use two sets of 90# capacity slides so they would be thin (under .5"). This is the first real fitup with the dummy batteries.
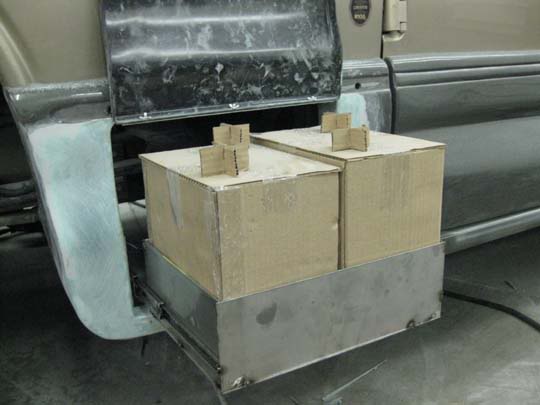
Everything seemed to be fitting, so decided to continue on and made cardboard templates for the box parts.
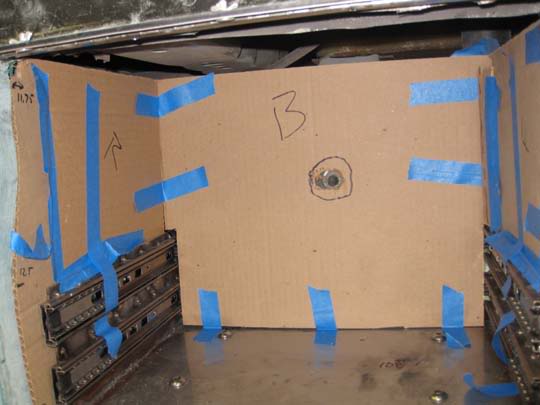
Then made the box parts out of 1/8" fiberglass sheet. They are joined with pop rivets and aluminum angles. I couldn't find any lightweight stainless angle, so these will be painted with epoxy primer. If they still corrode, I will have to have some angles made at a tin shop.
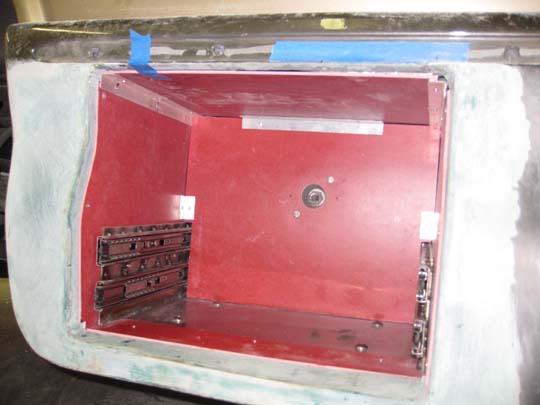
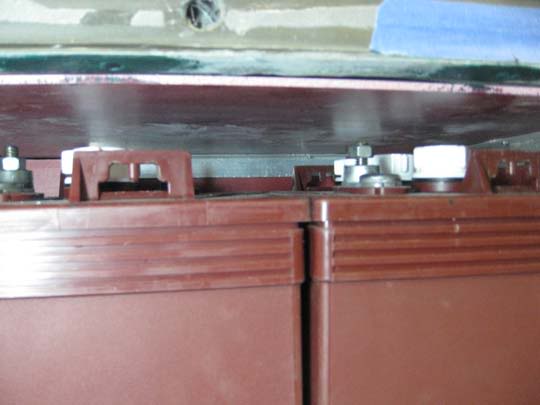
This is the final fitup with real batteries, which are the taller Trojan T145 at 260AH. With the tray in:
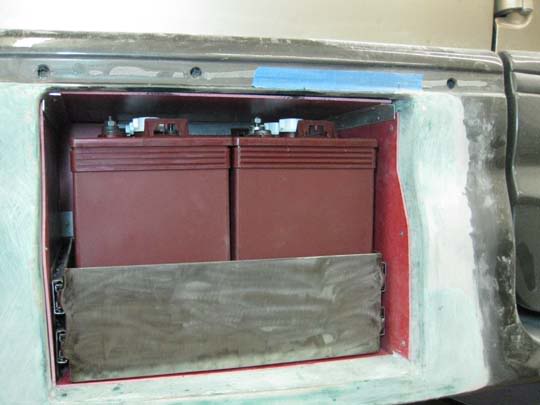
With the tray out (no box in this pic).
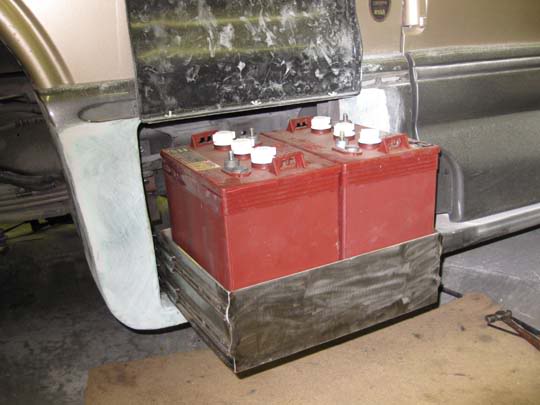
Plenty of room at the top,
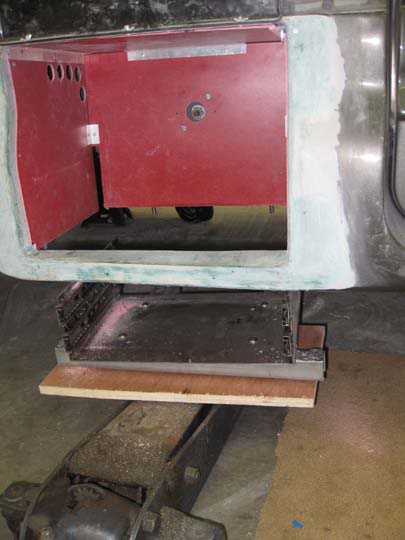
The entire subframe, support bracket and box can be removed out the bottom without disassembling the box,
There is plenty left to do, but it looks like it is going to work out well. Still need to fit up battery cables, battery hold down, slide latch, door latch, and do all the finish bodywork and paint. It will also need a plastic splash shield, like the rear one, to keep water and crud out of the battery box vents. I will post more as things get completed.
|

|

|
 12-12-2011, 11:38 AM
|
#2
|
|
Platinum Member
Join Date: Oct 2006
Location: New Brunswick, Canada
Posts: 8,828
|
 Re: Dual 6v into 07 C190P Roadtrek
Looks to me like you are doing a fantastic job  I don't think I could of even imagined such a project. So maybe 370Ah total capacity if you continue to use a group 27 battery in the space behind the rear wheel! That is awesome. You turned the needed fiberglass repair and paint work into an opportunity.
|

|

|
 12-12-2011, 02:47 PM
|
#3
|
|
Platinum Member
Join Date: Aug 2010
Location: Minnesota
Posts: 12,457
|
 Re: Dual 6v into 07 C190P Roadtrek
Quote:
|
Originally Posted by markopolo
Looks to me like you are doing a fantastic job  I don't think I could of even imagined such a project. So maybe 370Ah total capacity if you continue to use a group 27 battery in the space behind the rear wheel! That is awesome. You turned the needed fiberglass repair and paint work into an opportunity. |
We are going to keep the group 27 behind the wheel as a 115AH Trojan SCS200. We also have tapped off the van fuse box (always 12v) to pull power for the compressor frig. I added a switch to control the frig so it can run off the coach batteries or the van. When we are away from the van, we can shut off the coach batteries to save running the detectors and other parasitic losses. We now have another SCS200 available to use as the van battery, so we will at least 60AH of the 115 available for the frig. Total of 435AH, should do us well, and the increase in capacity didn't cost us any space.
|

|

|
 12-12-2011, 11:55 PM
|
#4
|
|
Platinum Member
Join Date: Oct 2006
Location: New Brunswick, Canada
Posts: 8,828
|
 Re: Dual 6v into 07 C190P Roadtrek
Your photos make it look easy but that is a lot of skilled work. If someone wants do the same but doesn't have the skills they can just show the shop this page. Did you get the door from a Roadtrek dealer?
|

|

|
 12-13-2011, 01:41 AM
|
#5
|
|
Platinum Member
Join Date: Aug 2010
Location: Minnesota
Posts: 12,457
|
 Re: Dual 6v into 07 C190P Roadtrek
Quote:
|
Originally Posted by markopolo
Your photos make it look easy but that is a lot of skilled work. If someone wants do the same but doesn't have the skills they can just show the shop this page. Did you get the door from a Roadtrek dealer?
|
The door is the Roadtrek door they use on the new ones. I got it from Leisure Time RV. At first Roadtrek wouldn't sell me one as my VIN was not correct for the application, but Maureen at Leisure Time convinced them to sell it.
|

|

|
 12-17-2011, 10:35 PM
|
#6
|
|
Platinum Member
Join Date: Aug 2010
Location: Minnesota
Posts: 12,457
|
 Re: Dual 6v into 07 C190P Roadtrek
I finally got a chance to get some things done on the conversion. The dayshift (I do second shift) engineer at work quit, so my sweet 3 days X 10 hours (full benefits) cruise to retirement went straight into the $hitter. Now it is 50+ hours a week covering both shifts until we can get someone hired and trained. Bummer, but Oh well.
I picked up some cold galvanizing paint to put on the welds of the support, which is made of galvanized J channel. Never used it before, so we will see how well it survives in service.
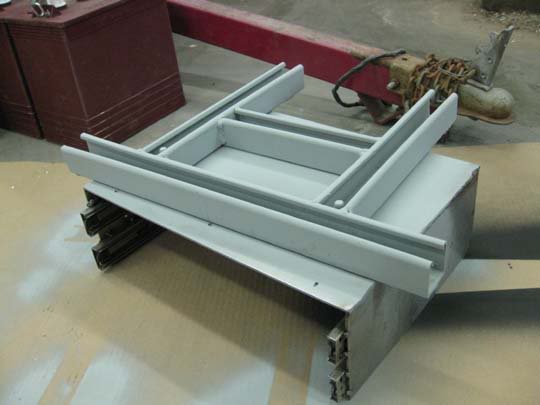
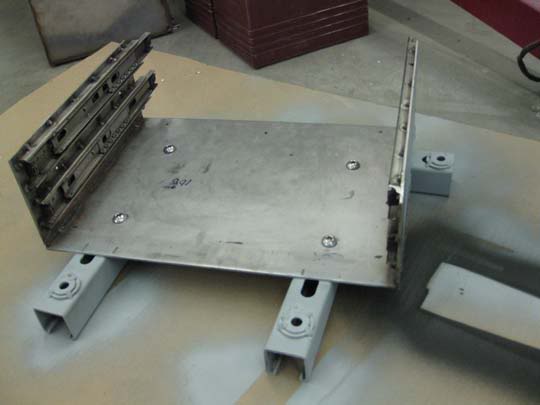
Since I was going to use epoxy primer anyway, I got some black to shoot the bodywork and the inside of the box. Hopefully, it will protect the aluminum angles and fiberglass from the fumes, plus we have quite a bit of ventilation. I won't be topcoating the inside of the box, just into the box on the flanges.
This is with final glazing filler in place and sanded, ready to paint (allegedly).
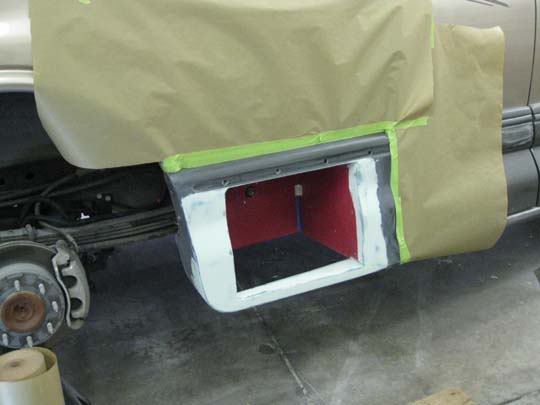
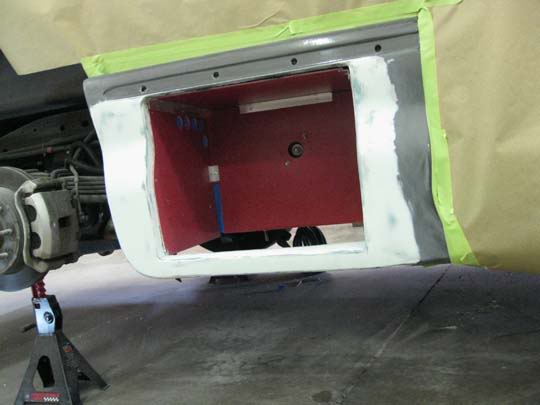
This is with about 4 coats of epoxy primer. That is much thicker than required, but I want enough on to block sand out some of the imperfections before final paint. They call the paint non-sandable, but it just seems to mean it is really hard to sand, not that it caused problems. Since it is epoxy, it is hard full depth. Another good point is that you can use filler over it without issue. That is good thing, as I found quite a few small areas that will need a touch of filler as I sand the primer. I am always amazed at what I miss when it is just filled and sanded, and I looked it over very closely before spraying the primer. It will get another layer of primer after sanding and spot filling to encapsulate the filler, and I will prime the door at that time. Once I get it all smoothed out and ready for final paint, I will reinstall the mount and mask off the box. Then comes the long and tedious cleaning of the garage to get all the dirt and sanding dust up, so it doesn't wind up in the final finish. It really has to be clean when you are so close to the floor, and every bit of dirt has to also be blown out of all the cubbies in the van that are where the sprayer will stir up things . Right now I am contemplating if it will be easier to remove the rear door, or try to paint around it, which will be tough to do.
|

|

|
 12-24-2011, 06:11 PM
|
#7
|
|
Platinum Member
Join Date: Aug 2010
Location: Minnesota
Posts: 12,457
|
 Re: Dual 6v into 07 C190P Roadtrek
Still plugging along on the conversion. Instead of removing the entire rear door, I just took off the plastic ground effects panel, and it gave full access to where I needed to get to. Sanded out a couple of Roadtrek made clearcoat runs on the running board and masked to the traction pad. Tape wouldn't stick to the pad itself, so I had to tape just off it on the paint and try to not get much clear there and wind up with a ridge.
Here it is in epoxy primer
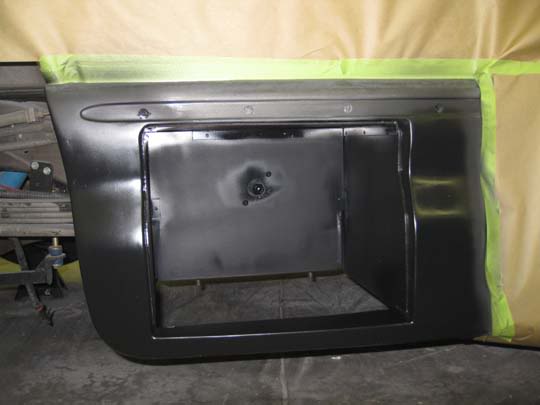
And with base and clear
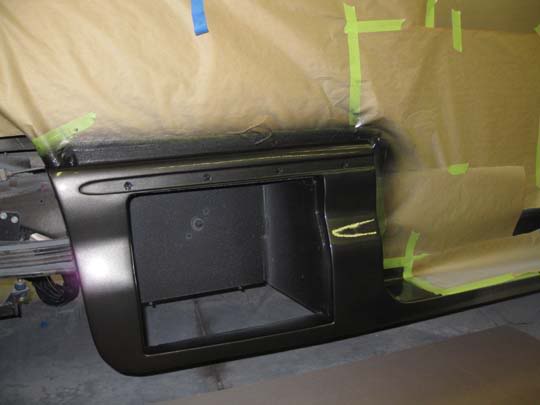
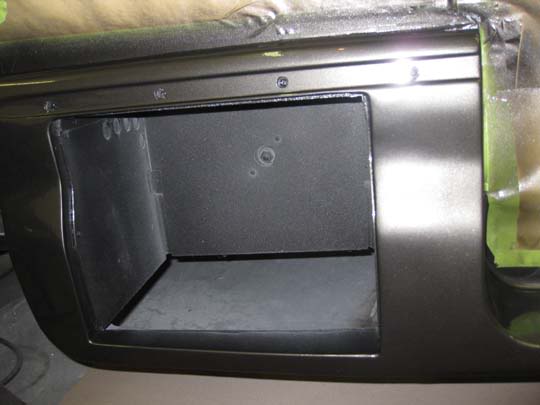
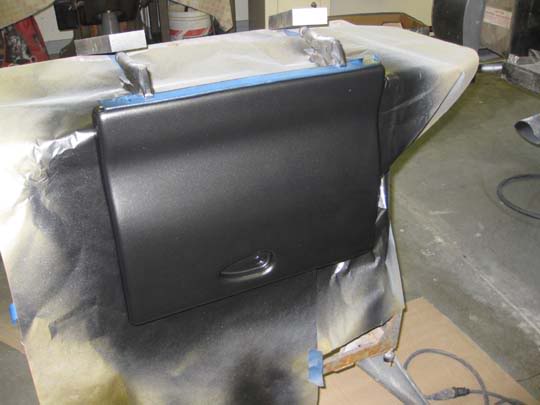
I hung the door vertical to paint it so the metallic would flop the same as on the rest of the areas. Since it was painted separately, but from the same mix of paint, it should be a fairly good match, but so many things effect the metallic that it may be slightly off in different lighting conditions.
Here is the door, which looks rough textured, but it is the reflections off the metallics off the flash making it look that way
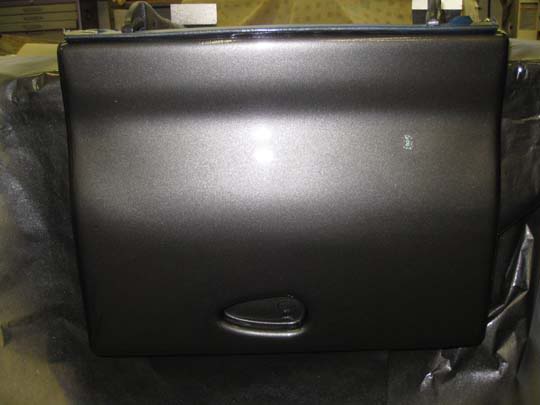
A straight on of the door. The odd looking area is a refection of light coming through the window of the shop, passing through the van, and reflecting off the passenger side mirror. Very odd.
I currently have the garage heat cranked to 85 degrees, so I should be able to unmask in a couple of hours. There will be some wet sanding needed to get rid of some dirt specs, but that can be done anytime. Hopefully, later today, I will be able to put some black silicone on the joints of the fiberglass box to make sure they don't vibrate, and to seal the fender area right behind the door hinge. A couple of days for everything to dry and cure and I should be ready to start the final assembly on Monday (woohoo holiday). I am really looking forward to getting it done and seeing how the two sizes of batteries react to the charging. I have seen a bunch of contradictory info on that, but we will see if I need to build it into a bank system.
|

|

|
 12-24-2011, 09:38 PM
|
#8
|
|
Platinum Member
Join Date: Nov 2006
Location: Virginia
Posts: 764
|
 Re: Dual 6v into 07 C190P Roadtrek
Booster, your creativeness & professionalism never ceases to amaze me. That garage of yours is a real workshop. Merry Xmas & Happy New Year. Ron
__________________
Ron J. Moore
'15 RT210P
|

|

|
 12-24-2011, 10:00 PM
|
#9
|
|
Platinum Member
Join Date: Aug 2010
Location: Minnesota
Posts: 12,457
|
 Re: Dual 6v into 07 C190P Roadtrek
Thanks Ron, Merry Christmas to you also, and everyone else!
The good thing about the newer paints is that they set up very quickly, so 4 hours after spraying 3 coats of color and 3 coats of clear (only 5 minutes between coats), I was able to unmask and start putting things back together.
I had some concern that putting the support and frame back in from the bottom would be tough, as it had to line up with the slots in the box and hit all 4 hanger rods all at the same time. It actually went up on the jack and right into place without much prodding at all. I pop riveted the bottom front filler strip back into place, and also pop riveted through the track mount into the box. Then the black silicone to fill the upper gap behind the hinge mount, and to silence the fiberglass joints, and it was pretty much done and ready to put in the tray and batteries, so I can fit the cables, holddown, latches and such. As long as I had a bit more time available, I blended in the paint on the running board by wet sanding and polishing. As expected, the paint doesn't match the Roadtrek version very well, but that is just the way it goes. The blend area that shoes is very small under door. Finished up by putting the ground effect plastic back on the door.
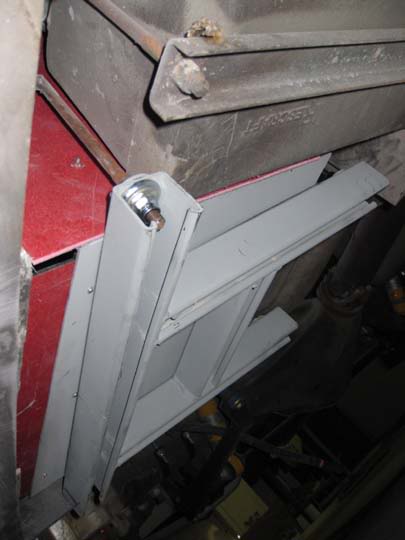
Here is the finished mount from below.
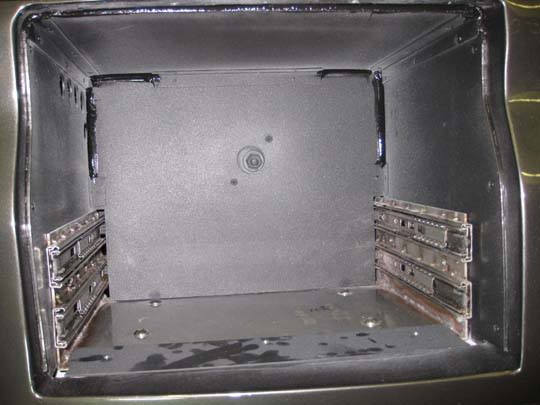
The finished battery area, without the tray in place.
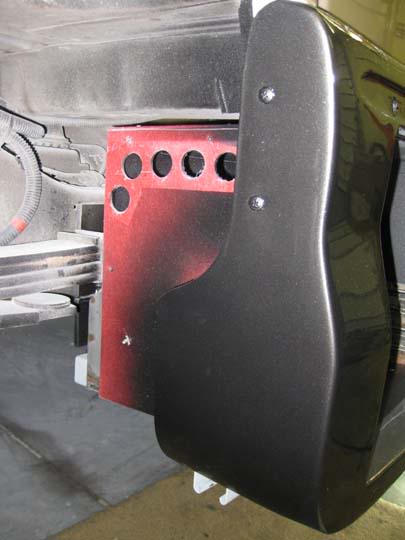
From the wheel well, without the new splash guard in place.
|

|

|
 12-27-2011, 12:59 AM
|
#10
|
|
Platinum Member
Join Date: Aug 2010
Location: Minnesota
Posts: 12,457
|
 Re: Dual 6v into 07 C190P Roadtrek
Finally getting to the home stretch, clearing up and finishing all the PITA little details, and rounding up all the little parts and materials to complete things.
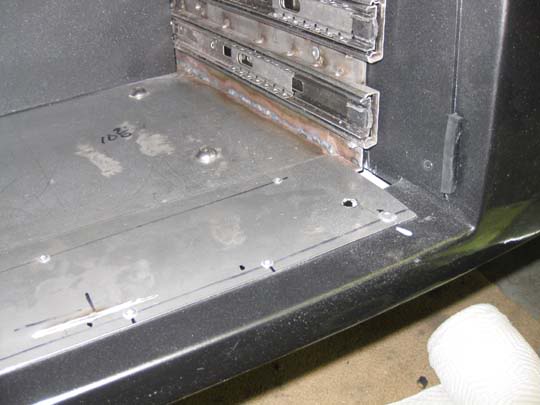
I decided that instead of adding small stainless steel plates for the door latch and barrel bolt (slide retention), I would just replace the fiberglass filler panel that I had used, with a stainless one, a little bigger so it could be pop riveted to the base and to the fiberglass frame for a little extra strength. Had to take a trip to the local steel supplier to get a piece of 20 gauge stainless sheet, got lucky and found a 4" wide by 4' long piece in the drop barrel, so I got to pay by the pound (a whole $5). On the way back I had a 1 gauge ground cable made at Interstate, as the original was too short. I wonder why Roadtrek uses 1 gauge when they are fused at 50, or 80 amps?
The new filler piece in place. The pink is modelling clay that I was using to locate the slot position for the door latch.
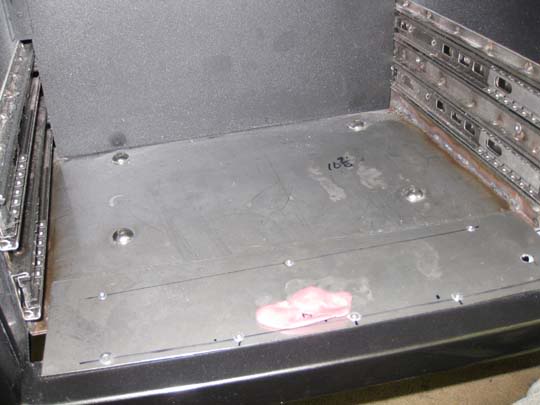
I had to extend the door latch arm so it would reach into the slot I cut in the filler piece. Roadtrek engages an angle bracket, so they don't need the length, but I sit very low with the tray (so I could use the taller batteries) and don't have room for a bracket.
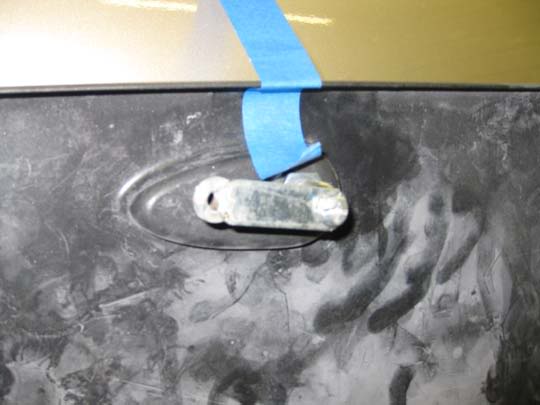
With the slot cut for the latch, and hole for the barrel bolt.
I welded the barrel bolt to the battery tray so there wouldn't be any fasteners intruding inside it.
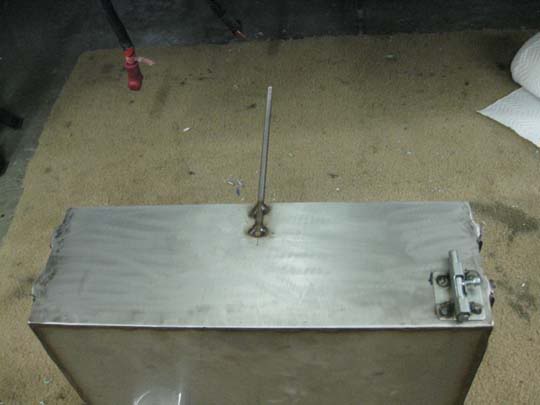
I started out by welding the holddown rods on the outside of the battery tray, but found the rear on interfered with the cables folding in behind the batteries. The tray was big enough to move the rod inside the box, and I put 1/4" of rubber on the back wall to keep the batteries off the rod. I also put sleeving over both rods. Once the batteries are in place, I also slide a piece of the 1"/4" rubber between them, so the don't rub on the rods.
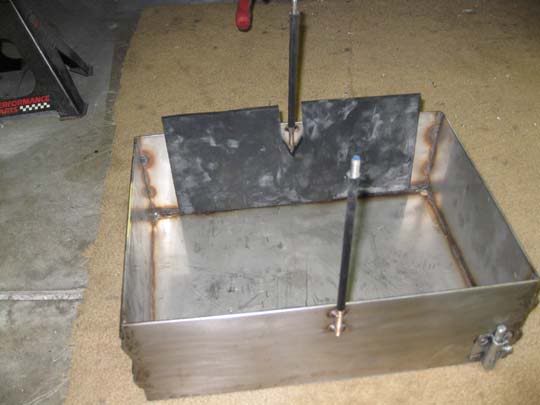
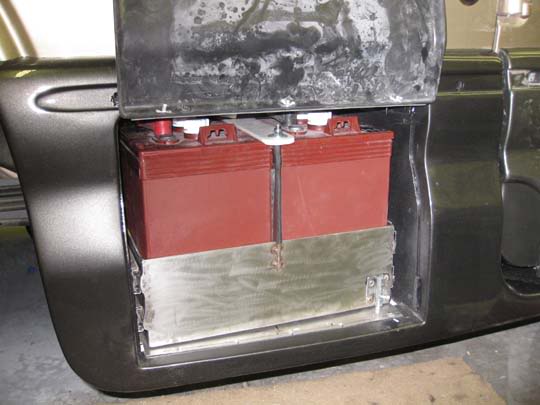
Cables on, holddown in place, barrel bolt engaged, as they will be in regular use.
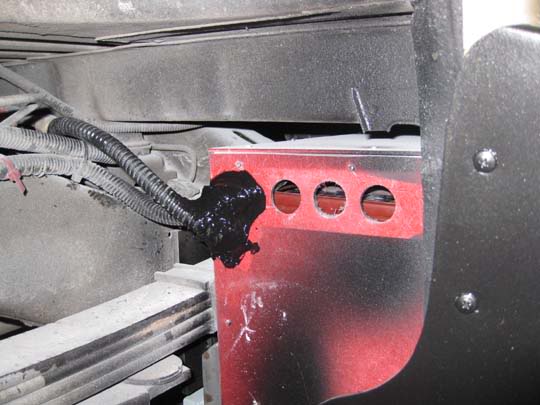
The original positive battery cable from Roadtrek had worn all the way through the sleeving, and had started to damage the insulation, where they had it coming into the original box. I didn't want that to happen, so I put MANY wraps of friction tape around the cables where they go through the box wall, and then made a silicone "strain relief" to support them in place when the tray is moved in and out. Crude, but effective!
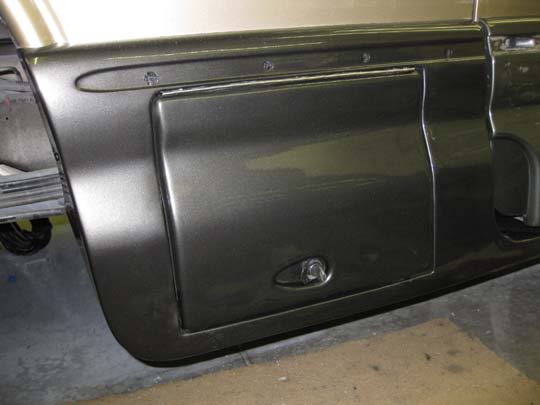
I added a rubber stop on one side to stop the door and got the door latch to engage at the right location, to make the door line up as well as possible. The new door from Roadtrek doesn't have the double wall setup like the other doors, and original door, so it is none to flat. I may epoxy some aluminum strips to the inside of it to firm it up and straighten it out.
Door closed and latched, with batteries in place.
About all that is left is to work a bit on the cable supports in the box and a few loose ends. I have it setup so that one cable folds down behind the batteries, and the other folds up above the batteries in the rear. The one that goes up sometimes hangs to low and gets caught behind with the other cable, so the tray doesn't slide in all the way. Once the outside silicone sets up, I will do the same on the inside of the box. The fasteners on the holddown aren't stainless, but the rods are, so I will have to go to the hardware store for them. A couple of spots to touch up that I nicked putting it all back in, and reattach the rubber strips. I should then be able to mount the new splash guard and call it a day!
|

|

|
 12-27-2011, 01:21 AM
|
#11
|
|
Platinum Member
Join Date: Oct 2006
Location: New Brunswick, Canada
Posts: 8,828
|
 Re: Dual 6v into 07 C190P Roadtrek
I'm impressed. What a project! It looks good. 
|

|

|
 12-28-2011, 02:34 AM
|
#12
|
|
Platinum Member
Join Date: Aug 2008
Location: Sarnialabad, The Newly Elected People's Republic of Canuckistan
Posts: 3,246
|
 Re: Dual 6v into 07 C190P Roadtrek
Me too. Amazing what you can do with a heated garage, an idea, and some spare time? 
__________________
It's not a sprint(er) (unless you make it one), it's (hopefully) a marathon.
RV - 2018 Navion 24V + 2016 Wrangler JKU
|

|

|
 12-31-2011, 10:27 PM
|
#13
|
|
Platinum Member
Join Date: Aug 2010
Location: Minnesota
Posts: 12,457
|
 Re: Dual 6v into 07 C190P Roadtrek
Hopefully, this is the end of this project, as it looks like it is pretty much done at this point.
I added silicone strain relief to the inside of the box and tied up the positive cable a bit and they seem to fold OK now.
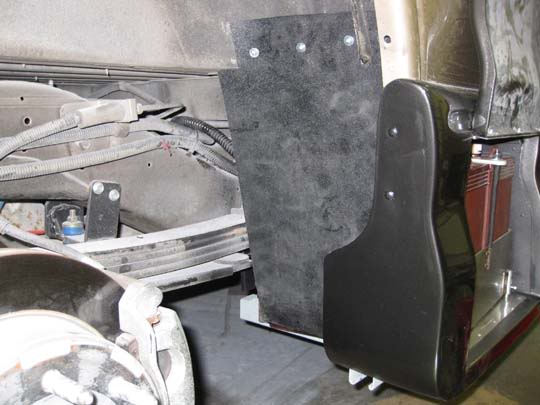
The splash guard was already done. Just cut out of .08 ABS sheet.
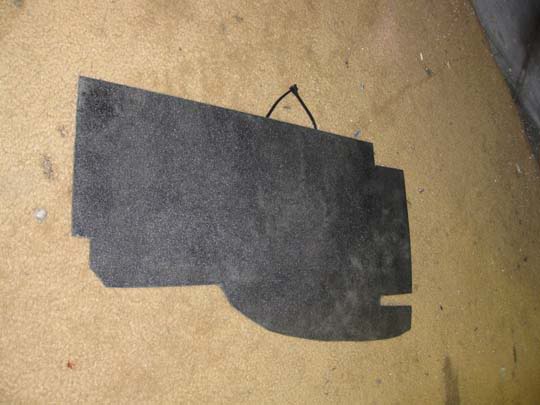
And mounted with some #8 sheet metal screws, except for the bottom which I stuck on with silicone so I Wouldn't have to put screws into the battery support.
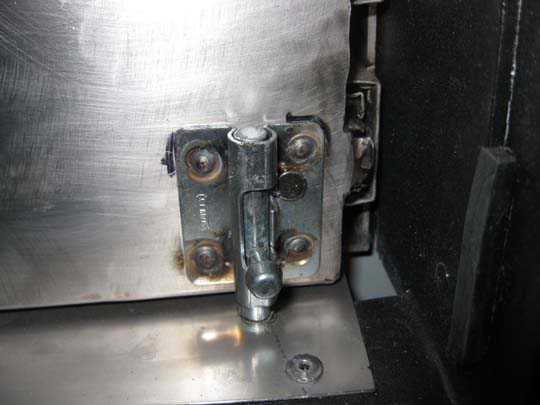
The barrel bolt latch could slip down when the tray was out, and hit paint on the way back in, so I put a magnet on it to hold the bolt up.
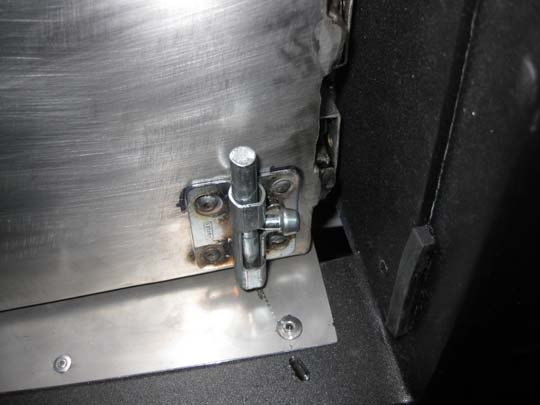
It does the job well.
The big batteries, in the deep tray, and my bad hands don't get along well, so we needed to carry the lift strap with us in case we needed to take out the batteries for some reason. More magnets seemed like a good idea, so I epoxied a couple to the batteries.
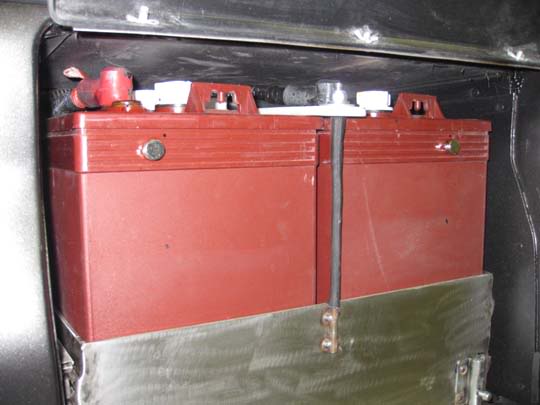
The strap holds on them very securely, and comes off easily.
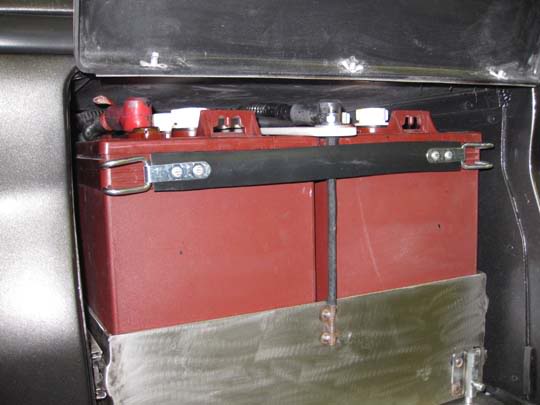
I put the rubber strips back on with contact cement, and...
Here are the pics I have been waiting for!
Complete with the door open.
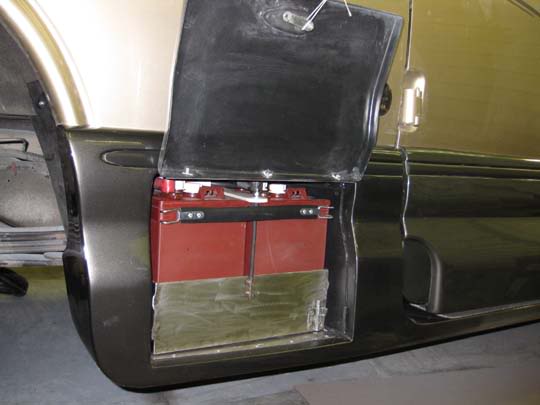
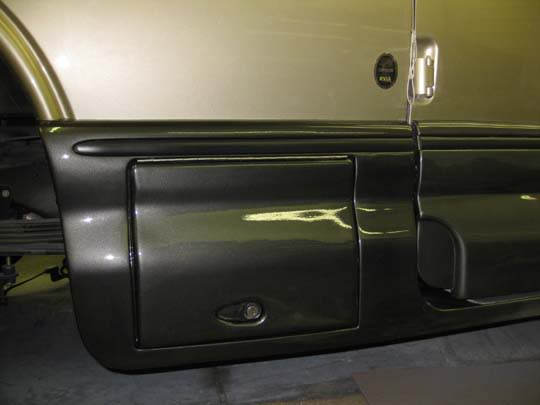
With the door closed.
And from the rear.
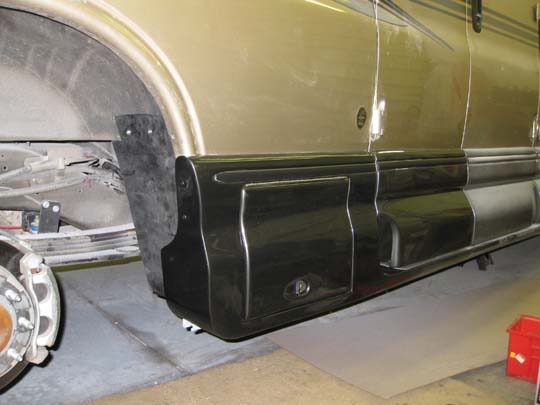
All and all it went pretty well, about the amount of trouble and work that I had predicted, but did take a bit longer than I thought.
I think it was easily worth the work and money to get the extra 145AH of capacity.
On a 1 to 10 scale with 1 being and oil change and 10 building a B from scratch, I would put this as about an 8. The hardest part is not skill IMO, but having all the necessary tools for so many varied steps.
I will now find out if the folks that claim running different batteries together is a horrible idea, as we now have the two GC2H batteries in parallel with two group 27 deep cycle batteries (one as a starting battery and one in the rear battery compartment). I will be monitoring the specific gravity and water levels closely to see how they react.
Now on to the rest of the stuff the van needs before spring!
|

|

|
 12-31-2011, 10:59 PM
|
#14
|
|
Platinum Member
Join Date: Aug 2008
Location: Sarnialabad, The Newly Elected People's Republic of Canuckistan
Posts: 3,246
|
 Re: Dual 6v into 07 C190P Roadtrek
I would be surprised if there were any problems running different types and capacities, but I've been
challenged on it here, and on other forums, for a variety of what sounded to me like nonsensical reasons.
I'm not an electrical engineer, however, and accepted the critiques as gracefully as possible, but I've been
running two mixed age and make (and probably capacity) batteries for over a year and several trips without
any noticeable issues.
__________________
It's not a sprint(er) (unless you make it one), it's (hopefully) a marathon.
RV - 2018 Navion 24V + 2016 Wrangler JKU
|

|

|
 01-13-2012, 02:03 AM
|
#15
|
|
Platinum Member
Join Date: Mar 2008
Location: Gig Harbor, WA
Posts: 372
|
 Re: Dual 6v into 07 C190P Roadtrek
That is a very nice piece of work.
Well done. 
Does the battery support structure reduce the ground clearance in that area (lower than the gray/black tanks)?
I have been considering replacing Roadtrek's "C" channel supports with some of the "J" channel material; then attaching some aluminum skid plates under all the delicate tanks, etc..
__________________
Brian
2009 Roadtrek 190V, 5" lift - Build Thread
2004 Toyota 4Runner
2014 Honda CR-V
1965 Dodge Coronet 440
|

|

|
 01-13-2012, 02:21 AM
|
#16
|
|
Platinum Member
Join Date: Aug 2010
Location: Minnesota
Posts: 12,457
|
 Re: Dual 6v into 07 C190P Roadtrek
Quote:
|
Originally Posted by Photog
That is a very nice piece of work.
Well done. 
Does the battery support structure reduce the ground clearance in that area (lower than the gray/black tanks)?
I have been considering replacing Roadtrek's "C" channel supports with some of the "J" channel material; then attaching some aluminum skid plates under all the delicate tanks, etc.. |
It is a bit lower than the original battery compartment was, but not lower than the the stuff around it, like the running boards. The J channel does show at the bottom of the front of the wheel well a little. I may either paint that black so it is less visible, or cut it at an angle so it wouldn't show. The angle cut wouldn't effect the strength at all.
|

|

|
 08-16-2022, 05:32 PM
|
#17
|
|
Gold Member
Join Date: Jul 2022
Location: California
Posts: 90
|
Wow. What a project. Been planning to add a second battery into the accessory box in front of the rear wheel on the 02CRT190P. I plan on AGM batteries so sliding access although a bonus, would not be necessary. Mobile life has a pricey battery tray but it's not available at this time. It will be easy to craft an exact fit plywood battery tray with hold downs and wood stops to keep the battery from sliding around in the compartment adding dual RT slide bolt design. The part of this project I could use some advice on would be the gauge, length and route of the parallel battery cables. I have seen some options on the wiring to facilitate charging but I think keeping it in simple is the limit of my skill set. I will have use the Progressive Dynamics 9245c which allows for two AGM batteries in parallel charging when connected to shore power. Thanks for this amazing post
|

|

|
 08-16-2022, 07:03 PM
|
#18
|
|
Platinum Member
Join Date: May 2016
Location: LA
Posts: 1,551
|
Wow, a prehistoric thread Floorman.
booster's projects are impressive, Not like mine in this instance with an 05/04 190P.
I used 4 awg from the original battery to the other one, a load sharing no no. It worked just fine with Walmart Group 27 batteries, 5 1/2 years. Last year during Hurricane Ida, I lived in the B. The amp hours seemed down some, so I replaced them. At that time my opinion was that expensive agm's had been obsoleted by inexpensive lithium's, so it was 2 more Walmart's, inexpensive agm's or lithium's. I chose agm's, but most are too large - too tall or too long, and a tray would not work.
I chose these:
https://www.amazon.com/gp/product/B0...?ie=UTF8&psc=1
They have been happy since last September, very pleased: Although purchased together, they were shipped separately and arrived in the same truck (UPS). Voltage, they were .01 volt of each other!
Have fun with your project.
Bud
|

|

|
 08-16-2022, 07:05 PM
|
#19
|
|
Platinum Member
Join Date: May 2016
Location: LA
Posts: 1,551
|

Quote:
Originally Posted by Bud

Wow, a prehistoric thread Floorman.
booster's projects are impressive, Not like mine in this instance with an 05/04 190P.
I used 4 awg from the original battery to the other one, a load sharing no no. It worked just fine with Walmart Group 27 batteries, 5 1/2 years. Last year during Hurricane Ida, I lived in the B. The amp hours seemed down some, so I replaced them. At that time my opinion was that expensive agm's had been obsoleted by inexpensive lithium's, so it was 2 more Walmart's, inexpensive agm's or lithium's. I chose agm's, but most are too large - too tall or too long, and a tray would not work.
I chose these:
https://www.amazon.com/gp/product/B0...?ie=UTF8&psc=1
They have been happy since last September, very pleased: Although purchased together, they were shipped separately and arrived in the same truck (UPS). Voltage, they were .01 volt of each other!
Have fun with your project.
Bud |
"I chose agm's, but most are too large - too tall or too long, and a tray would not work."
I should have said 100 amp agm's.
|

|

|
 08-16-2022, 10:28 PM
|
#20
|
|
Gold Member
Join Date: Jul 2022
Location: California
Posts: 90
|
Booster's knowledge and skill sets are epic. Thanks Bud for your post. The exisiting battery wiring seems to be about 5/16" or 6awg. Going 4awg sounds a safe bet and I reckon about 8 1/2 ft in length. I carefully measured the existing tray and came up with max of 12 7/16" x 7 x 9 1/4 high. There are not a lot of group 27 AGM batteries out there that fit the tray. I looked for 2 hours went back and forth about Lithium or AGM but almost everything is just a bit too big. Bass Pro S has one made by Universal Power . Deka has a pricey HR3500, Crutchfield has a XS Power D2700 and Banchee has a semi pricy one on Amazon. I always read the 1 star reviews and try to avoid the brands that have Customer service negative remarks. Bass Pro and Crutchfield have great Customer service but so does the local Auto Zone who has a group 27 lead acid for cheap. Thanks again for your experience and advice. I'll hack something together
|

|

|
 |
|
 Posting Rules
|
You may not post new threads
You may not post replies
You may not post attachments
You may not edit your posts
HTML code is Off
|
|
|
|
 » Recent Threads
 |
|
|
|
|
|
|
|
|
|
|
|
|
|
|
|
|
|
|
|
|
|
|
|
|
|
|
|
|
|
|
|
|
|