There was a very good discussion on the Yahoo board a while ago about batteries using a lot of water, charge voltages, battery types, etc. We were among the ones that have noticed a fairly large amount of water used by our two SCS200 Trojan 12volts, in our 07 Roadtrek C190P. It could be plugged in all winter on shore power, in the garage, and barely use any water at all, but after 2500 miles of driving it would be down half way to the plates. The net conclusion was that the driving voltage (in the Chevy) of 14.1 volts is too high and is causing the batteries to gas continuously on long drives, especially when you start out with them fully charged. AGM users may also have issues of the batteries getting hot, and/or damaged by the continuously too high voltage.
I looked at 12v to 12v chargers, but they are very spendy, and would be a lot of work to put in, requiring an added contactor and a bunch of wiring. At that point a disconnect for the coach batteries looked to be a better solution. A big disconnect switch would work, but could accidentally be left off when you want charging of all the batteries, and on shore power (the chassis battery wouldn't be charged).
When I looked closely at the separator, it was obvious it is just a single pole, normally open, contactor, with an add on control to turn it on when it sees charge voltage from either side. The great part is that the add on module bolts onto the contactor coil inputs, so it can be easily modified to break one of the coil connections and be able to turn the contactor off when you want to. A simple switch in that line would work, but again could be forgotten like a big switch.
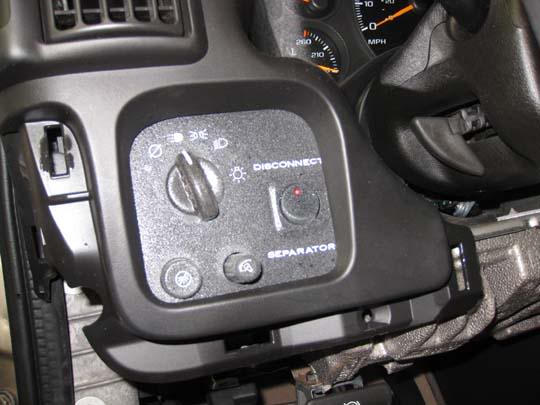
My plan was to find a way that it would work totally as a normal separator would, except when the van was running, when it could be disconnected manually. That way if it was forgotten on, it wouldn't affect anything except when you are driving, and with an indicator light on the switch, on the dash, you should see it immediately, if it is forgotten.
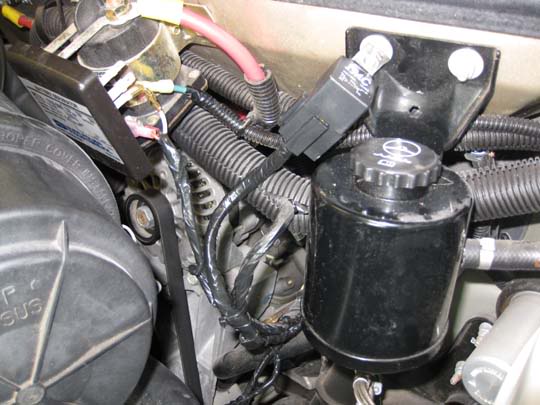
The circuit is simple. Power from the run side of the ignition powers the coil of a small relay, through the override switch. The relay's normally closed contacts are put into the line from the control module to the contactor of the separator. Because of the normally closed contacts, the separator works as stock, unless the relay is triggered, and it can't be triggered unless the van is running because it gets it's power from the run side of the ignition.
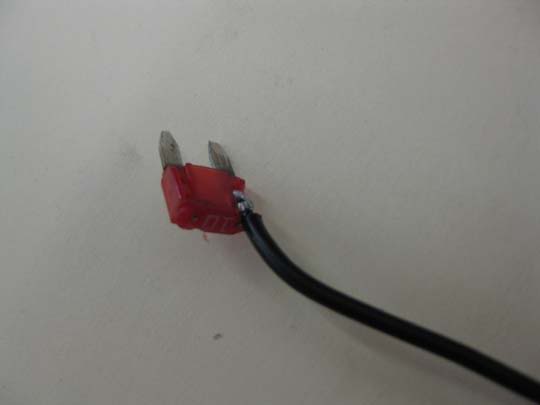
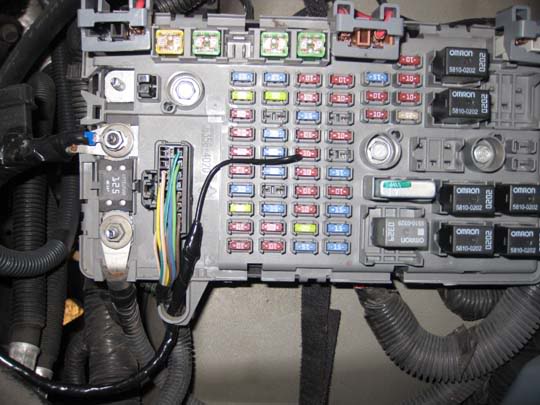
Getting the run side power was not terrible, but I did cheat a bit. I didn't want to open up the taped and sleeved harnesses to get to wires to splice to, and fuse box had "spare" fuse positions available. I also didn't want to disassemble the fuse box to tap into the spare fuse mount, so I made a "fuse" adapter to get the power. The fuse socket has power on one side from a built in buss, but the output side isn't connected to anything. By using a fuse, and adding a wire to it on the output side, you can get the power without doing anything else. Only downside is if you blow the fuse, you have to do another one. If this was a critical circuit, I would use a 30 amp fuse and add an inline 10 amp, but it is no big deal if this circuit doesn't work for a little while, so I didn't do an inline fuse.
Here is the modified fuse.
And how it sits in the fuse box.
The relay mounts on an existing bolt on the power steering reservoir.
There was room in the headlight switch to add the override switch. It has an indicator that only comes on when it has power and is switched on, so it only lights when the separator is disconnected by the switch, with the motor running.
I drilled a 3/8" hole through the firewall just inboard of the harness boot and seal, which I couldn't get the wires through. My harness was only 1/4", which allowed me many wraps of friction taped right at the hole to seal it and protect the wires, as I couldn't get at it to add a grommet.
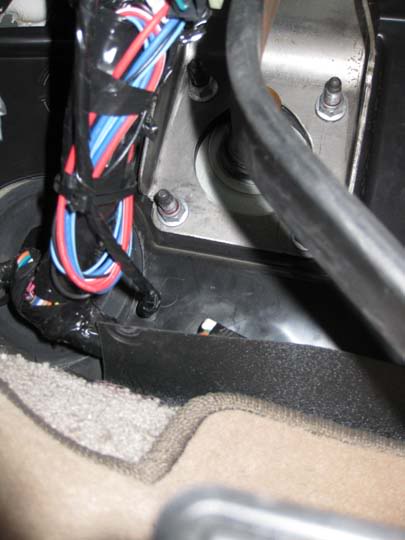
I put a plug and socket in the wires so the could be unplugged if I have to remove the headlight switch in the future, and tied the harness up under the dash.

This is the underhood wiring before harnessing and tieback.

And with it taped and finished off.

You can see the tap in to the controller to contactor at the bottom of the separator. I just unbolted the small strap, bolted a faston onto the strap, which was connected to the controller, and put a ring terminal connection at the contactor.
I haven't run the van to test it yet, but I did simulate the engine charge voltage with a battery charger on the chassis battery, with the key in the run position, and it worked as expected.
I will be very interesting to see what effect it will have on our water use and battery life.
Almost forgot the important part. Under $15 and about 3 hrs work. Maybe a 2 or 3 in difficulty, minimal tools needed.