Roadtreker357
Senior Member
The rear of a 210 has a metal “perch” between the axle and rubber bump-stop. When hitting a good bump, the bump-stop contacts the perch. After talking with someone in R&D at SuperSprings, I was sent an offset spring mounting plate that would move the spring further outboard and allow for more contact of the spring bottom with the perch. Without this modification, the spring ends up overhanging the inboard end of the perch too much. The perch is narrower than the spring, so the spring hangs over both sides of the perch. I don’t think the spring I received is one of their standard offerings.
To make the spring mounting plate end up parallel to the ground, a 4” disc is also needed to span the “ridges” on each edge of the frame. The disc goes between the spring mounting plate and the frame bottom.
The frame of the 210 at the mounting location has a frame sub member welded to the bottom of the main frame. The problem this caused is getting the correct mounting screw length. Too short (35MM) and the mounting plate nut could not enter the frame slot. Too long and the screw would hit the inner frame above the mounting slot before the mounting plate would be tightly fastened. I was provided with a 50mm screw and ended up cutting off 3/16” to ensure the screw would not hit the inner frame. A 45mm screw should be long enough to be able to get the mounting nut inside the frame, and short enough not to hit the inner frame.
The rear Sumo-Springs were installed first and raised the rear end almost 1”. This alone might help with the gas filling issues that sometimes occur to 210 owners. However, installation of the front Sumo-Springs raised the front, too, which caused the rear end to end up 5/8” higher than prior to Sumo-Springs installation. The front end was raised ¾”.
Rear Spring: 511411 raptor 4” sumo. Front spring: SSF-204-47
I’ve only taken the Roadtrek on a 20-mile drive, including some interstate with one 18-wheeler passing me. Also drove over some parking lot speed bumps. Sway to the side appears to be lessened on a turn and when passed by the truck. Speed bumps approached straight on, and not creeping, are harsh. These bumps approached at an angle and slower did pretty well. More long-distance trips needed to really evaluate the handling effects.
Photos (might need to rotate each 90 degrees clockwise):
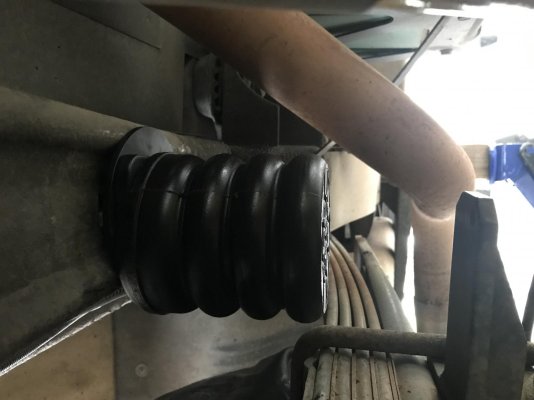
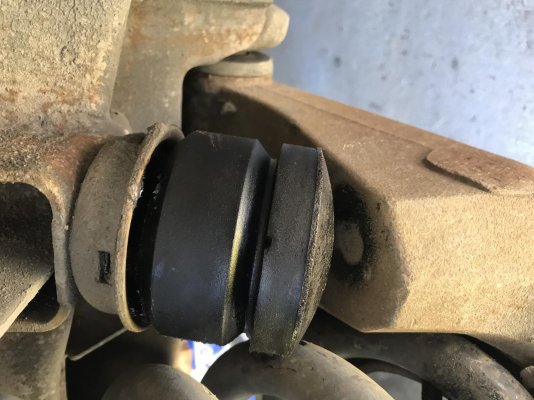
Rear spring installed, before lowering the frame, perch below spring
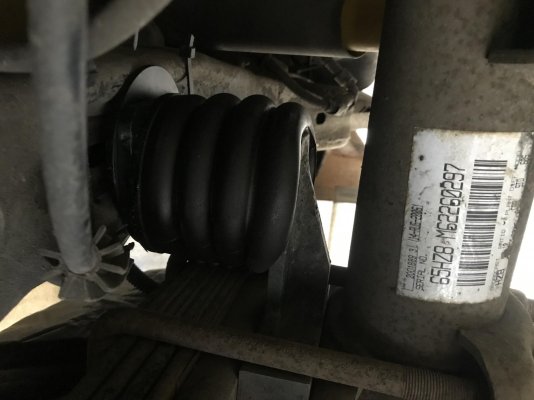
Rear spring after lowering the frame
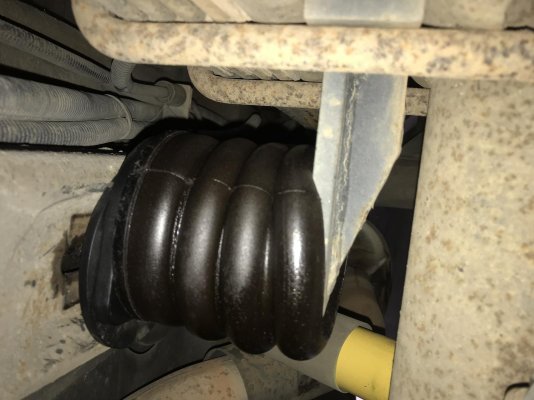
Rear spring, different view
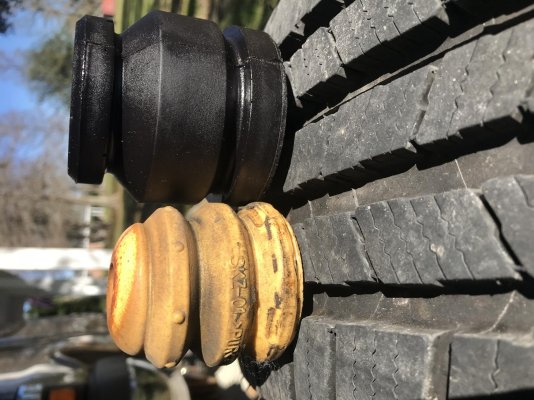
Front spring compare to OEM spring (yellow)
Front spring installed, wheel still hanging down
To make the spring mounting plate end up parallel to the ground, a 4” disc is also needed to span the “ridges” on each edge of the frame. The disc goes between the spring mounting plate and the frame bottom.
The frame of the 210 at the mounting location has a frame sub member welded to the bottom of the main frame. The problem this caused is getting the correct mounting screw length. Too short (35MM) and the mounting plate nut could not enter the frame slot. Too long and the screw would hit the inner frame above the mounting slot before the mounting plate would be tightly fastened. I was provided with a 50mm screw and ended up cutting off 3/16” to ensure the screw would not hit the inner frame. A 45mm screw should be long enough to be able to get the mounting nut inside the frame, and short enough not to hit the inner frame.
The rear Sumo-Springs were installed first and raised the rear end almost 1”. This alone might help with the gas filling issues that sometimes occur to 210 owners. However, installation of the front Sumo-Springs raised the front, too, which caused the rear end to end up 5/8” higher than prior to Sumo-Springs installation. The front end was raised ¾”.
Rear Spring: 511411 raptor 4” sumo. Front spring: SSF-204-47
I’ve only taken the Roadtrek on a 20-mile drive, including some interstate with one 18-wheeler passing me. Also drove over some parking lot speed bumps. Sway to the side appears to be lessened on a turn and when passed by the truck. Speed bumps approached straight on, and not creeping, are harsh. These bumps approached at an angle and slower did pretty well. More long-distance trips needed to really evaluate the handling effects.
Photos (might need to rotate each 90 degrees clockwise):
Rear spring installed, before lowering the frame, perch below spring
Rear spring after lowering the frame
Rear spring, different view
Front spring compare to OEM spring (yellow)
Front spring installed, wheel still hanging down